Creating an Autumn Leaves Tattoo Design
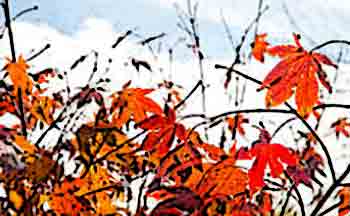
The Objective
The point here is to convey the exciting, vibrant feeling of fall foliage. Do not get too involved with detail; otherwise, you'll lose the spontaneity of the overall design.
The Method
Work with bold, loose design elements, focusing on the slight variations in color that occur. Simplify is the name of the game, therefore try to pick out whatever pattern there is.
In general, the easiest tattooing approach involves working from light to dark, but there are exceptions. Here, for instance, almost all of the colors possess roughly similar value; the pattern the leaves form is created by color, not by darks and lights, so an alternate way of working will be most effective.
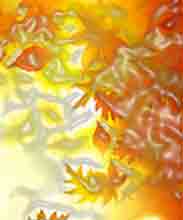
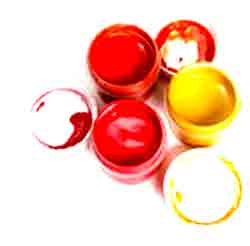
You want to start by following the rhythm generated by the strongest color, red. Use a large tattoo needle to help keep your art strong and loose. Be sure to leave some holes in the leaf masses. The reason you do so is to suggest their lacy quality, and keep their edges lively. After you've tackled the patterns that the reds form and while the ink is still fresh, apply some darker pigment onto the red areas. Blend in the darker paint, again using fluid tattoo needle work.
When the ink has dried, it's time to add the yellows, golds, and greens. Just as before, the patches of ink should have erratic, uneven contours. While the skin is a little moist, put in bits of darker tone into the tattoo design and work them about to prevent the surface from becoming too flat.
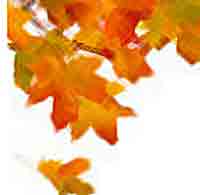
Next, ink in the trunk and branches. Since they pull the design together by getting across the tree's structure, stop and think before you proceed with the tattooing process. The branches should reach outward and embrace all areas of the painting and they should connect, one to another. Vary the heaviness and the pressure of your needlework, and be sure that they don't get too tight. As a final touch, apply a small amount of ink in the areas that seem a little flat—here, the corners.
When the ink has dried, it's time to add the yellows, golds, and greens. Just as before, the patches of ink should have erratic, uneven contours. While the skin is a little moist, put in bits of darker tone into the tattoo design and work them about to prevent the surface from becoming too flat.
Next, ink in the trunk and branches. Since they pull the design together by getting across the tree's structure, stop and think before you proceed with the tattooing process. The branches should reach outward and embrace all areas of the painting and they should connect, one to another. Vary the heaviness and the pressure of your needlework, and be sure that they don't get too tight. As a final touch, apply a small amount of ink in the areas that seem a little flat—here, the corners.
Making Sense of Distant Masses of Color in a Trees Tattoo Design
The Issue
The orange, red, and yellow masses may first catch the eye, but it's the deep green conifers that define the structure of this landscape tattoo art.
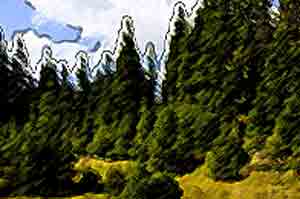
How to Resolve It
Develop the brightest areas first, paying attention to the way in which the vibrant masses blend together. Then, to punctuate the scene, add the deep greens.
Step One
In your tattoo design, try to map out the basic fields of color. Don't get too literal here; what you want is just a simple outline to help you keep the patterns in mind as you begin to pierce the skin. Concentrate especially on the most brilliant areas and on the outlines created by the green trees. Next, start laying down the very brightest colors, here pure lemon yellow and cadmium red.
Step Two
Cover certain areas of the skin except for the sections where you've established the yellow and red. Begin to lay in various shades of yellow, orange, and red. As you work, you'll discover the close value relationships between your reds and oranges, and how they tend to blend together. Vary the strength of your inking to strengthen or weaken the values, and try to keep the tattoo art lively. You're aiming for a dynamic surface, with lots of variation in both color and value.
Step Three
While the ink is drying, start adding definite shapes to the reds and oranges. If necessary, add a bit more ink onto some areas and then blend the colors together; this procedure is used here in the lower left corner. When the ink has dried, begin adding the dark green trees. Give their shapes some definition.
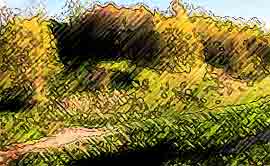
The dark green conifers struck in last give the finished tattoo design a sense of depth. They break up the indistinct orange and red masses, and get across a feeling of how the trees run up the hillside. The yellow areas put down first have the lightest value in the tattoo. Just like the dark greens, though not as dramatically, they help indicate the patterns formed by the trees.
