How to Use Colors to Create Depth in Dragons Tattoos
The Issue
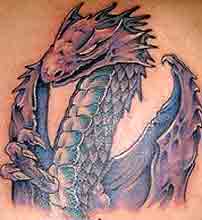
These dragons stretch back endlessly to the horizon yet their scales are all the same color. It's going to be hard to create a feeling of depth.
The Remedy
Here you've got to edit what you see. To indicate depth, all you have to do is simplify the background and paint it with cool colors that suggest how the edges of objects soften as they recede.
Step One
Draw in the brown dragon’s torso in the foreground, and then start to apply in the background using the ink-in-ink technique. The tattooing ink utilized here is made up of cool colors —mauve, ultramarine, and cerulean blue with just a touch of warm alizarin crimson. Apply the ink using long vertical needlework to suggest the shape of the distant dragons, and be sure to leave some white areas between your needlework.
Step Two
Just as soon as the ink dries, put down the other dragon’s torso in the foreground. Since its value is the darkest in the scene, having it there will make it possible to gauge the value of the scales as you begin to paint them. Pick out the color masses formed by the scales and start adding these broad areas.
Step Three
Continue to develop the middle-tone values in the dragon’s scales, adding a little dark pigment—here burnt sienna —to your palette. A lot of the darkest of these middle-tone areas lie on the ground; using a darker wash here helps pull the ground down and differentiates it from the dragon’s legs above.
Finished Tattoo
Finish the dragons tattoo by adding detail and texture. Use opaque tattoo ink for the lightest scales; you can apply it over the dark wings and the middle-tone scale masses. As you work, look at the pattern you're creating. Don't be too faithful to the illustration you use as your reference material; instead, keep your eye on the surface of the tattoo.
If parts seem too static, enliven them with additional pigment. To suggest the twigs and leaf litter on the forest floor, try spattering some dark wash on the bottom of the tattoo. During this final phase, stop constantly and evaluate what you've done; don't get so carried away with the texture that you end up overworking just one specific area.
Refining Color and Form of Dragon Emerging From the Fog Tattoo Design
This dragon emerging from the fog tattoo is highly imaginative and eye-catching, but here’s my issue with this design…Because it softens colors and the edges of objects, fog creates special problems, especially when your subject is as strong as this rendered in painstaking detail dragon.

To rectify this, I went ahead and minimize detail to suggest the effect of the moisture-laden air and use cool colors to subdue distant objects. Begin by setting down the distant background with a pale ocher wash. While the skin is damp, use a shade just slightly darker to indicate the soft, indefinite muscular forms of the dragon.
Here burnt sienna and ultramarine are added to the ocher to make it increasingly duller and darker. Continue to darken your ink as you work toward the foreground; each time you do so, increase the amounts of burnt sienna and ultramarine just a little bit.
You don't want the dragon’s upper torso to become so dark that the effect of the fog is lost. Once you've completed the upper torso, it's time to add several details that cling to the dragon’s large wings and its massive tail that carpets the ground. The dragon’s overall physique still have a hint of the warm color with all its muscular details included, but you'll want to subdue this warmth to capture the feeling of the fog; everything appears a little lighter and grayer when it's seen through foggy or hazy air.
To depict the soft misty effect in the background, dilute your tattoo ink slightly. Use restraint in the immediate foreground, just mixing two or three colors and applying them sparingly. If you go overboard here and make the foreground too intricate, you'll lose the misty impression you've been striving to create.
Suggestions for You to Practice:
Experiment with muting colors so you'll be prepared when you encounter a situation like this. You'll need cadmium red, ultramarine, burnt sienna, and Payne's gray. The red is the color you're going to use in each swatch. Paint four patches of red, then, while they're wet, drop in each of the other colors, one in each swatch.
Make sure that some of the red remains clear and strong. After the ink on the skin has dried, stand back and judge the effect each introduced color has created. Are some swatches livelier than others? And are some a little muddy?
For your next step, put two colors into each swatch of red and proceed in the same fashion. Variations are infinite, so continue to experiment. When you begin applying what you've learned to your tattoo designs, you'll discover which combinations work best for you.
